Undetected kaabli läbiviik1 deterioration causes catastrophic electrical failures, safety hazards, and costly equipment damage that results in unplanned downtime, regulatory violations, and potential injury to personnel, while inadequate inspection procedures allow gradual degradation of sealing integrity, corrosion buildup, and mechanical loosening that compromise system reliability and environmental protection. Many maintenance teams lack systematic visual inspection procedures, leading to overlooked warning signs that could prevent major failures.
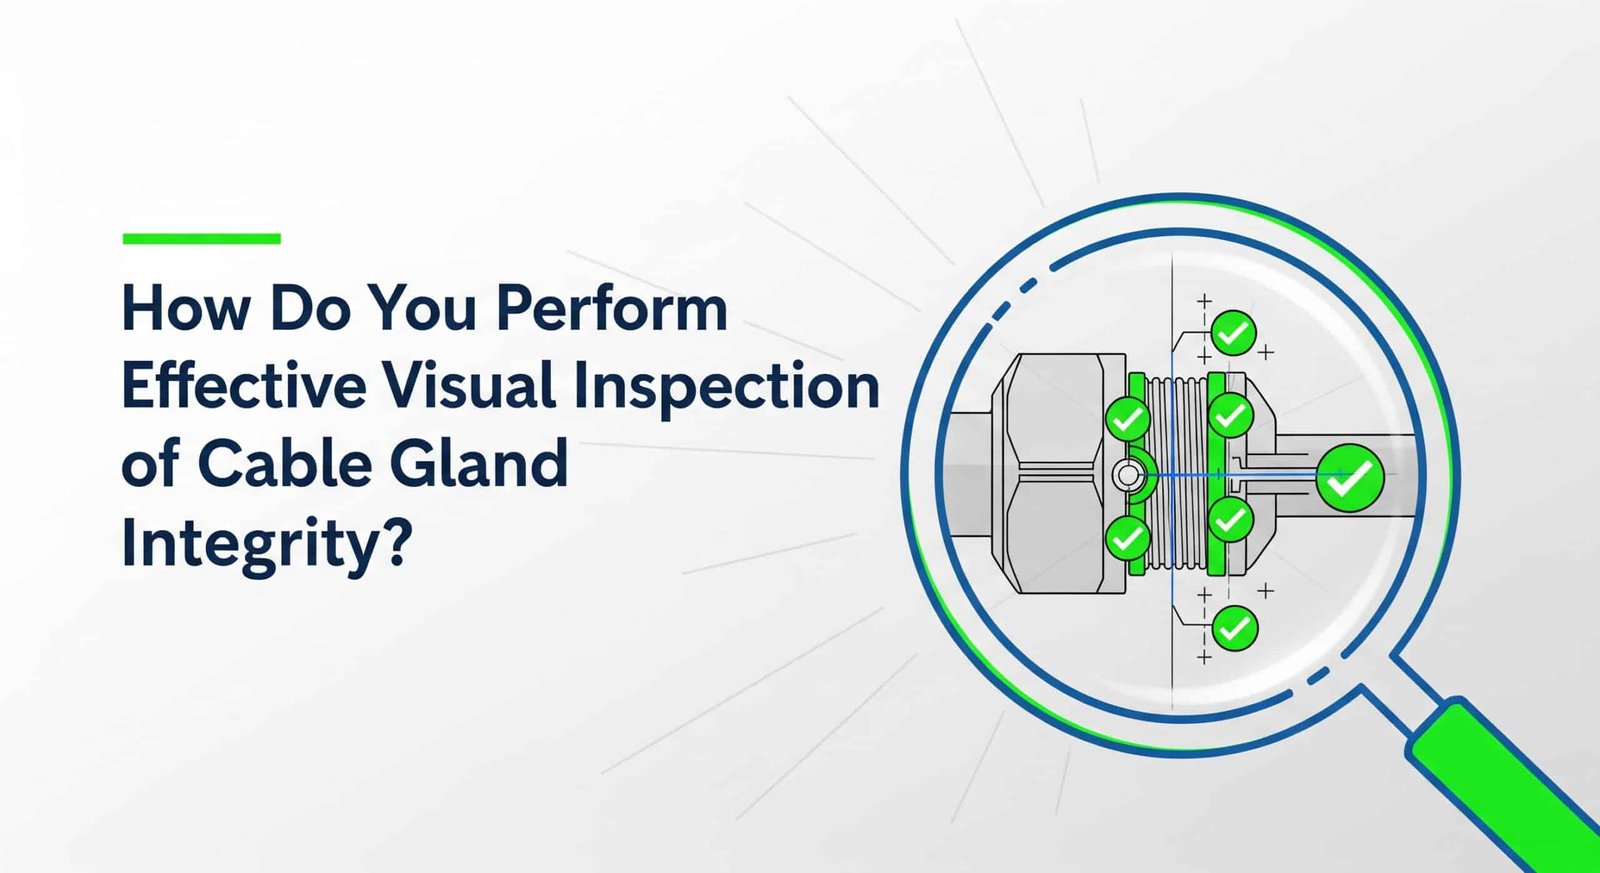
Effective visual inspection of cable gland integrity requires systematic examination of sealing surfaces, thread engagement, corrosion indicators, mechanical damage, and environmental protection features using standardized checklists, proper lighting, and documentation procedures to identify potential problems before they cause system failures, ensuring reliable operation and regulatory compliance through proactive maintenance strategies. Success depends on understanding what to look for and implementing consistent inspection protocols.
Having worked with maintenance teams across automotive plants in Stuttgart, offshore platforms in the North Sea, and chemical facilities throughout the Gulf region, I’ve learned that systematic visual inspection is the most cost-effective method for preventing cable gland failures and ensuring long-term system reliability. Let me share the essential checklist and procedures for effective cable gland integrity assessment.
Sisukord
- What Are the Key Visual Inspection Points for Cable Glands?
- How Do You Identify Common Cable Gland Problems?
- What Tools and Documentation Are Required for Inspection?
- How Do You Establish Effective Inspection Schedules?
- What Actions Should You Take Based on Inspection Results?
- FAQs About Cable Gland Visual Inspection
What Are the Key Visual Inspection Points for Cable Glands?
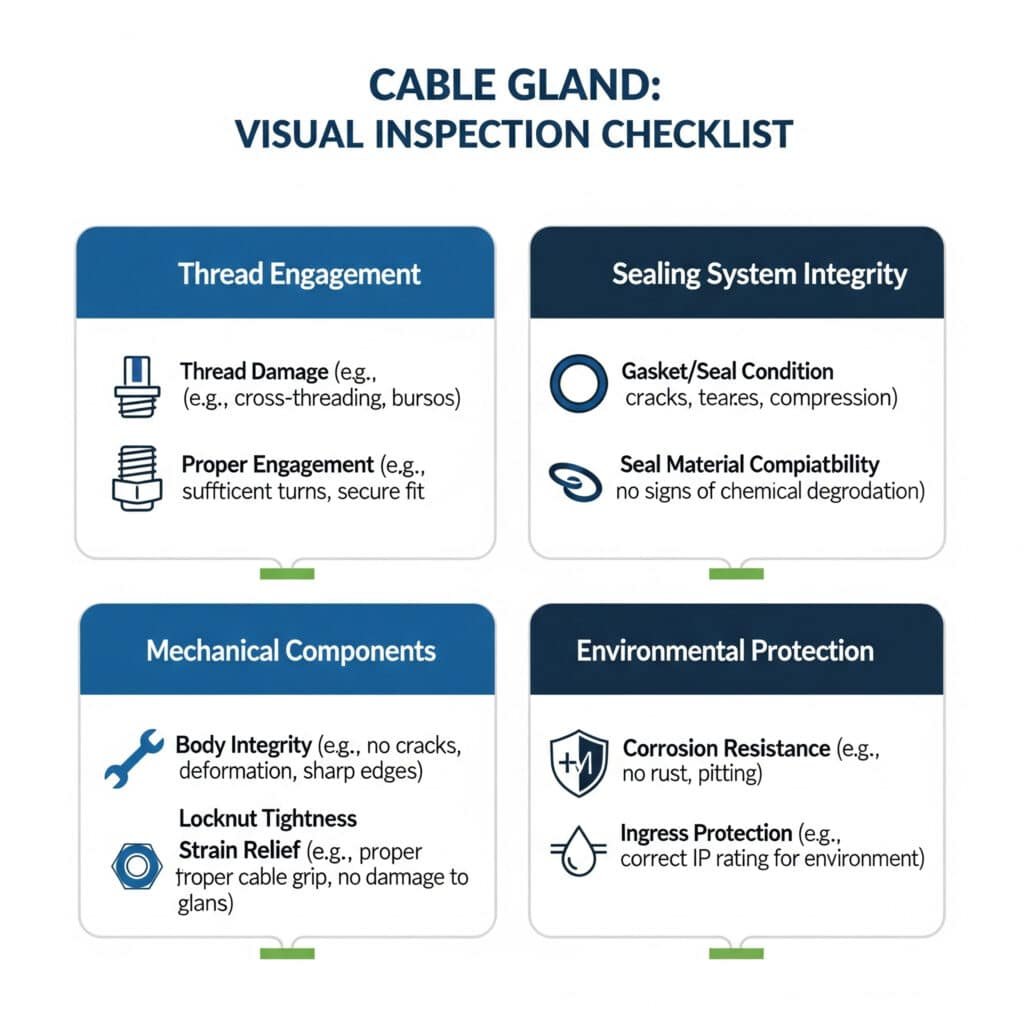
Key visual inspection points include thread engagement and condition, sealing gasket integrity, cable entry sealing, corrosion indicators, mechanical damage, proper cable strain relief, environmental protection effectiveness, and mounting security, with systematic examination of each component ensuring comprehensive assessment of cable gland condition and identification of potential failure modes before they compromise system integrity.
Understanding critical inspection points is essential because cable gland failures often develop gradually through multiple degradation mechanisms that are detectable through careful visual examination.

Thread Engagement and Condition
Thread Visibility: Verify adequate thread engagement with minimum 5-6 threads visible beyond the nut, ensuring proper mechanical connection and sealing compression.
Lõngakahjustus: Examine threads for cross-threading, stripping, or deformation that could compromise sealing integrity or mechanical strength under operational loads.
Corrosion Assessment: Check for thread corrosion, particularly in marine or chemical environments, that could prevent proper tightening or cause gradual loosening over time.
Lubrication Status: Assess thread lubrication condition, noting excessive drying or contamination that could affect future maintenance or adjustment procedures.
Sealing System Integrity
Gasket Condition: Inspect primary sealing gaskets for cracking, hardening, kompressioonikomplekt2, or extrusion that indicates replacement necessity for maintaining environmental protection.
O-Ring Assessment: Examine O-rings for proper seating, visible damage, or displacement that could allow moisture ingress or compromise pressure ratings.
Sealing Compound Status: Check sealing compounds for cracking, shrinkage, or separation from surfaces that could create leak paths in harsh environments.
Cable Entry Sealing: Verify cable-to-gland sealing integrity, looking for gaps, cable movement, or visible moisture ingress around cable entries.
Mechanical Component Evaluation
Body Integrity: Examine gland body for cracks, impact damage, or deformation that could compromise structural integrity or environmental protection.
Nut Condition: Assess hex nuts for rounding, cracking, or excessive wear that could prevent proper installation torque or future maintenance access.
Clamping Mechanism: Verify cable clamping components are properly positioned and show no signs of over-compression or cable damage from excessive tightening.
Tüve leevendusfunktsioon: Confirm strain relief components are properly supporting cables without creating stress concentrations or allowing excessive cable movement.
Environmental Protection Assessment
IP-klassifikatsioon Hooldus: Verify environmental protection features remain intact, including gasket sealing, thread engagement, and absence of damage that could reduce IP-reitingud3.
Korrosioonikindlus: Assess coating condition, material degradation, or galvaaniline korrosioon4 that could compromise long-term environmental protection effectiveness.
UV-kiirguse lagunemine: Check for UV-induced material degradation in outdoor installations, particularly plastic components that may become brittle or discolored.
Keemiline vastupidavus: Examine for chemical attack indicators such as surface etching, discoloration, or material softening in chemical processing environments.
Marcus, a maintenance supervisor at a major automotive assembly plant in Munich, implemented systematic visual inspection procedures after experiencing recurring cable gland failures that caused production line shutdowns. The previous ad-hoc inspection approach missed gradual gasket deterioration and thread corrosion that led to moisture ingress and electrical faults. We developed a comprehensive visual inspection checklist with photographic documentation and trained his team on systematic examination techniques. The structured approach identified 40% more potential problems during routine inspections, reduced unexpected failures by 75%, and improved overall equipment reliability while reducing maintenance costs through proactive component replacement. 😊
How Do You Identify Common Cable Gland Problems?
Common cable gland problems include gasket deterioration, thread corrosion, mechanical loosening, cable damage, environmental seal failure, and improper installation, with visual indicators such as moisture stains, corrosion buildup, cable jacket damage, gasket extrusion, and thread wear providing early warning signs that enable proactive maintenance before complete failure occurs.
Recognizing problem indicators is crucial because early detection allows corrective action before minor issues escalate into major failures requiring emergency repairs.
Sealing and Moisture Problems
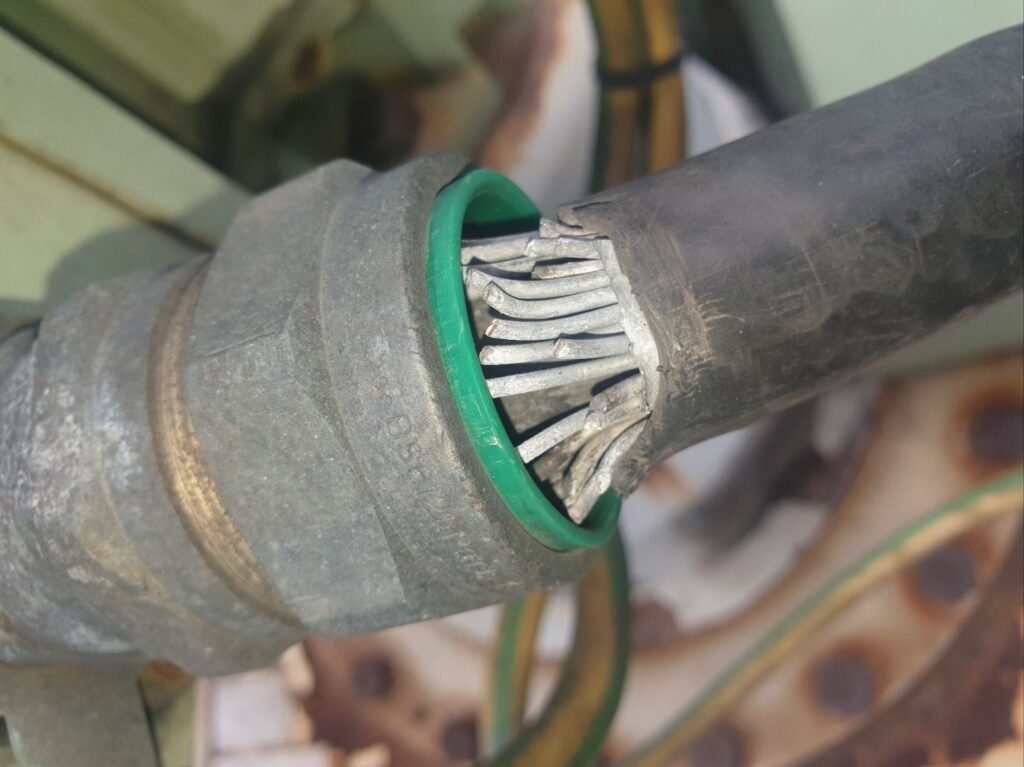
Moisture Stains: White mineral deposits, rust stains, or discoloration around cable entries indicate moisture ingress that compromises electrical safety and equipment reliability.
Gasket Extrusion: Visible gasket material squeezed beyond normal boundaries indicates over-compression or gasket deterioration requiring immediate attention.
Condensation Evidence: Water droplets, fog, or moisture accumulation inside transparent enclosures suggests compromised environmental sealing effectiveness.
Corrosion Patterns: Rust streaks, green copper corrosion, or white aluminum corrosion emanating from cable glands indicates moisture ingress and material degradation.
Mechanical Degradation Indicators
Thread Wear: Shiny or worn thread surfaces, metal particles, or difficulty in rotation indicate excessive wear that could lead to sealing failure.
Loosening Signs: Gaps between components that should be tight, visible thread exposure, or components that can be hand-tightened indicate mechanical loosening.
Deformation Evidence: Bent, crushed, or distorted components indicate impact damage or over-tightening that compromises structural integrity.
Fatigue Cracking: Hair-line cracks in metal components, particularly around stress concentration points, indicate fatigue failure development.
Cable-Related Issues
Jope kahjustus: Cuts, abrasions, or compression marks on cable jackets indicate improper clamping or inadequate strain relief protection.
Kaabli liikumine: Excessive cable movement at entry points suggests inadequate clamping or strain relief failure that could lead to conductor damage.
Insulation Exposure: Visible conductor insulation or bare conductors indicate severe cable damage requiring immediate attention for safety reasons.
Bend Radius Violations: Sharp cable bends near gland entries indicate installation problems that could cause conductor failure over time.
Environmental Degradation Signs
UV Damage: Chalking, color fading, or surface brittleness in plastic components indicates UV degradation that reduces material properties.
Keemiarünnak: Surface etching, discoloration, or material softening indicates chemical compatibility problems requiring material upgrade.
Temperatuuri mõju: Heat discoloration, material softening, or thermal expansion evidence indicates temperature-related degradation.
Biological Growth: Algae, mold, or other biological growth indicates moisture retention and potential material degradation in organic components.
Installation and Maintenance Issues
Improper Torque: Over-tightened components showing stress marks or under-tightened components with visible gaps indicate installation problems.
Missing Components: Absent gaskets, washers, or other components compromise performance and indicate incomplete installation or maintenance.
Wrong Materials: Incompatible materials, incorrect sizes, or non-standard components indicate specification errors requiring correction.
Poor Workmanship: Sloppy installations, damaged threads from improper tools, or contaminated sealing surfaces indicate training or procedure problems.
What Tools and Documentation Are Required for Inspection?
Effective inspection requires proper lighting equipment, magnification tools, measurement devices, photography equipment, and standardized documentation forms, combined with inspection checklists, material identification guides, and digital recording systems to ensure comprehensive assessment, consistent procedures, and proper documentation for maintenance planning and regulatory compliance.
Proper tools and documentation are essential because thorough inspection requires adequate visibility, accurate measurement, and systematic record-keeping to identify trends and plan maintenance activities.
Essential Inspection Equipment
Lighting Systems: High-intensity LED flashlights, headlamps, or portable work lights provide adequate illumination for detailed examination in confined spaces or poor lighting conditions.
Magnification Tools: Magnifying glasses, inspection mirrors, or digital microscopes enable detailed examination of threads, sealing surfaces, and small components.
Measurement Devices: Calipers, thread gauges, and rulers allow accurate assessment of component dimensions, thread engagement, and gap measurements.
Photography Equipment: Digital cameras or smartphones with macro capability document conditions for trending analysis and maintenance planning.
Documentation Systems
Kontrollnimekirjad: Standardized forms ensure consistent examination procedures and complete coverage of all critical inspection points across different personnel.
Digital Recording: Tablet-based inspection systems enable real-time data entry, automatic calculations, and immediate access to historical data for comparison.
Photographic Documentation: Systematic photography with consistent angles and lighting enables visual trending and provides evidence for maintenance decisions.
Hooldusandmed: Integration with computerized maintenance management systems (CMMS)5 enables tracking of inspection results, maintenance actions, and component lifecycle management.
Viitematerjalid
Specification Sheets: Manufacturer specifications for torque values, material properties, and performance ratings provide benchmarks for assessment.
Problem Identification Guides: Visual guides showing common problems and their indicators help inspectors recognize potential issues.
Material Compatibility Charts: Chemical resistance and temperature rating information ensures proper material selection for specific environments.
Regulatory Requirements: Applicable codes, standards, and regulations provide compliance criteria for inspection and maintenance decisions.
Kvaliteedikontrolli menetlused
Inspector Training: Systematic training programs ensure consistent inspection quality and proper use of tools and documentation systems.
Calibration Programs: Regular calibration of measurement tools ensures accuracy and reliability of inspection data for decision-making.
Audit Procedures: Periodic audits of inspection procedures and documentation quality ensure program effectiveness and continuous improvement.
Data Analysis: Statistical analysis of inspection data identifies trends, predicts maintenance needs, and optimizes inspection frequencies.
Hassan, who manages maintenance operations at a large petrochemical complex in Saudi Arabia, faced challenges with inconsistent cable gland inspection quality across multiple maintenance teams. Different inspectors were missing critical problems and documentation was incomplete, making it difficult to track component condition trends. We implemented a comprehensive inspection program with standardized checklists, digital documentation systems, and systematic inspector training. The program included tablet-based inspection forms with mandatory photo documentation and automatic data analysis. Within six months, inspection consistency improved by 90%, problem detection rates increased by 60%, and maintenance planning became more proactive based on reliable condition trending data.
How Do You Establish Effective Inspection Schedules?
Effective inspection schedules consider environmental conditions, application criticality, regulatory requirements, manufacturer recommendations, and historical failure data, with frequency ranging from monthly for critical harsh environments to annually for standard indoor applications, while incorporating condition-based adjustments and seasonal considerations to optimize maintenance resources and ensure reliable system performance.
Proper scheduling balances inspection costs with failure prevention benefits, ensuring adequate monitoring without excessive resource consumption.
Risk-Based Scheduling Factors
Application Criticality: Critical systems requiring high reliability need more frequent inspection than non-critical applications, with emergency systems requiring the most intensive monitoring.
Environmental Severity: Harsh environments with temperature extremes, chemical exposure, or high humidity require more frequent inspection than controlled indoor conditions.
Historical Performance: Components with poor reliability history or frequent problems need increased inspection frequency until performance stabilizes.
Regulatory Requirements: Some industries have mandated inspection frequencies that establish minimum requirements regardless of other factors.
Environmental Condition Considerations
Väljas olevad paigaldised: Weather exposure, UV radiation, and temperature cycling require quarterly to semi-annual inspection depending on climate severity.
Merekeskkond: Salt spray, high humidity, and corrosive conditions necessitate monthly to quarterly inspection for optimal reliability.
Keemiline töötlemine: Aggressive chemicals, temperature extremes, and process upsets require monthly inspection with immediate post-incident checks.
Standard Indoor: Controlled environments typically require annual inspection unless other factors indicate more frequent monitoring.
Inspection Frequency Matrix
| Keskkonna tüüp | Criticality Level | Base Frequency | Adjustment Factors |
|---|---|---|---|
| Indoor Standard | Madal | Iga-aastane | Good reliability record |
| Indoor Standard | Kõrge | Semi-Annual | Critical process systems |
| Outdoor Moderate | Madal | Kord kvartalis | Weather exposure |
| Outdoor Harsh | Kõrge | Igakuiselt | Extreme conditions |
| Mere-/keemiline | Iga | Igakuiselt | Corrosive environment |
Seasonal and Operational Adjustments
Seasonal Variations: Increase inspection frequency before severe weather seasons or during periods of extreme temperature variation.
Maintenance Windows: Coordinate inspections with planned maintenance outages to minimize operational disruption while maximizing access.
Process Changes: Temporary increase in inspection frequency following process modifications, equipment upgrades, or operational changes.
Tulemuslikkuse trendid: Adjust frequencies based on inspection results, increasing for deteriorating components and potentially reducing for consistently good performers.
Documentation and Tracking
Schedule Management: Computerized maintenance management systems (CMMS) automate scheduling, track completion, and manage inspector assignments.
Tulemuslikkuse näitajad: Track inspection effectiveness through failure prevention rates, problem detection statistics, and maintenance cost optimization.
Pidev täiustamine: Regular review of inspection schedules based on performance data, failure analysis, and changing operational requirements.
Resource Optimization: Balance inspection costs with failure prevention benefits to achieve optimal maintenance resource allocation.
What Actions Should You Take Based on Inspection Results?
Inspection results require immediate action for safety hazards, scheduled maintenance for developing problems, documentation updates for tracking trends, and preventive measures for potential issues, with decision criteria based on problem severity, safety implications, operational impact, and regulatory requirements to ensure appropriate response timing and resource allocation for optimal system reliability.
Proper response to inspection findings is critical because the value of inspection depends entirely on taking appropriate corrective actions based on the results.
Immediate Action Requirements
Safety Hazards: Any condition posing immediate safety risk requires immediate shutdown and correction, including exposed conductors, severe corrosion, or complete seal failure.
Environmental Violations: Conditions that compromise environmental protection or regulatory compliance require immediate attention to prevent violations or citations.
Critical System Threats: Problems that could cause critical system failure require emergency maintenance to prevent operational disruption.
Progressive Failure: Rapidly deteriorating conditions that could escalate quickly need immediate attention to prevent complete failure.
Scheduled Maintenance Actions
Komponentide asendamine: Plan replacement of components showing significant wear or deterioration during next scheduled maintenance window.
Preventive Upgrades: Schedule upgrades to higher-specification components in harsh environments or critical applications based on inspection findings.
Corrective Maintenance: Plan specific repairs for identified problems that don’t require immediate attention but need correction within defined timeframes.
System Improvements: Implement design modifications to address recurring problems identified through systematic inspection programs.
Dokumentatsioon ja trendid
Condition Records: Update component condition records with inspection findings to track deterioration rates and predict future maintenance needs.
Rikkeanalüüs: Document failure modes and contributing factors to improve future component selection and installation procedures.
Tulemuslikkuse trendid: Analyze inspection data trends to optimize maintenance schedules and identify systematic problems requiring design changes.
Cost Tracking: Monitor maintenance costs related to inspection findings to justify inspection programs and optimize resource allocation.
Preventive Measures
Keskkonnakaitse: Implement additional protection measures for components in harsh environments based on inspection findings.
Installation Improvements: Modify installation procedures to address problems identified through inspection programs.
Materjalide uuendamine: Specify higher-performance materials for applications where standard components show premature deterioration.
Koolitusprogrammid: Develop training programs to address installation or maintenance problems identified through inspection results.
Kvaliteedi tagamine
Follow-Up Inspections: Schedule follow-up inspections to verify effectiveness of corrective actions and ensure problems don’t recur.
Tulemuslikkuse valideerimine: Monitor system performance following maintenance actions to confirm problem resolution and prevent related issues.
Pidev täiustamine: Use inspection results to continuously improve maintenance procedures, component specifications, and installation practices.
Tarnija tagasiside: Provide feedback to component suppliers regarding performance issues to drive product improvements and better application guidance.
Kokkuvõte
Effective visual inspection of cable gland integrity requires systematic procedures, proper tools, consistent documentation, and appropriate response to findings. Success depends on understanding what to look for, when to look, and how to respond appropriately to inspection results.
The key to reliable cable gland performance lies in implementing comprehensive visual inspection programs that identify problems before they cause failures, enabling proactive maintenance that reduces costs and improves system reliability. At Bepto, we provide high-quality cable glands designed for long service life and easy inspection, along with technical support to help you develop effective inspection and maintenance programs that ensure optimal performance throughout the component lifecycle.
FAQs About Cable Gland Visual Inspection
Q: How often should I visually inspect cable glands?
A: Inspection frequency depends on environment and criticality, typically ranging from monthly for harsh outdoor/marine conditions to annually for standard indoor applications. Critical systems and corrosive environments require more frequent inspection.
Q: What are the most important things to check during cable gland inspection?
A: Focus on thread engagement, gasket condition, moisture ingress signs, corrosion indicators, cable entry sealing, and mechanical damage. These areas reveal most potential problems before they cause failures.
Q: Can I perform cable gland inspection while systems are energized?
A: Visual inspection of external components is generally safe on energized systems, but follow lockout/tagout procedures for any hands-on examination. Never remove or disassemble cable glands on energized equipment.
Q: What tools do I need for proper cable gland inspection?
A: Essential tools include good lighting (LED flashlight/headlamp), magnification (magnifying glass), measurement tools (calipers), camera for documentation, and standardized inspection checklists for consistency.
Q: How do I know when a cable gland needs immediate replacement?
A: Replace immediately if you see exposed conductors, complete gasket failure, severe corrosion, cracked gland body, or any condition that compromises safety or environmental protection. Don’t wait for scheduled maintenance.
-
Explore a detailed guide on the function, types, and components of cable glands. ↩
-
Understand the material science behind compression set and how it affects sealing performance. ↩
-
Learn what IP ratings mean and how they define protection against solids and liquids. ↩
-
Read an in-depth explanation of the electrochemical process of galvanic corrosion. ↩
-
Discover how CMMS software helps manage maintenance operations and track asset health. ↩


