Outdoor enclosures face constant threats from moisture, dust, and harsh weather conditions that can destroy your equipment in seconds.
Liquid-tight cable glands provide IP68-rated1 protection for outdoor enclosures by creating hermetic seals2 around cables, preventing water ingress and ensuring long-term equipment reliability in harsh environments.
Last month, I received an urgent call from David, a procurement manager whose solar installation project was delayed because water had infiltrated their junction boxes through poorly sealed cable entries.
Table of Contents
- What Makes a Cable Gland Truly Liquid-Tight?
- Which Material Should You Choose for Your Outdoor Application?
- How Do You Ensure Proper Installation for Maximum Protection?
- What Are the Common Mistakes That Compromise Waterproof Performance?
What Makes a Cable Gland Truly Liquid-Tight?
Understanding the engineering behind liquid-tight sealing can save you thousands in equipment replacement costs.
A truly liquid-tight cable gland combines multiple sealing mechanisms: O-ring seals, compression rings, and thread sealants to achieve IP68 protection ratings against water ingress under pressure.
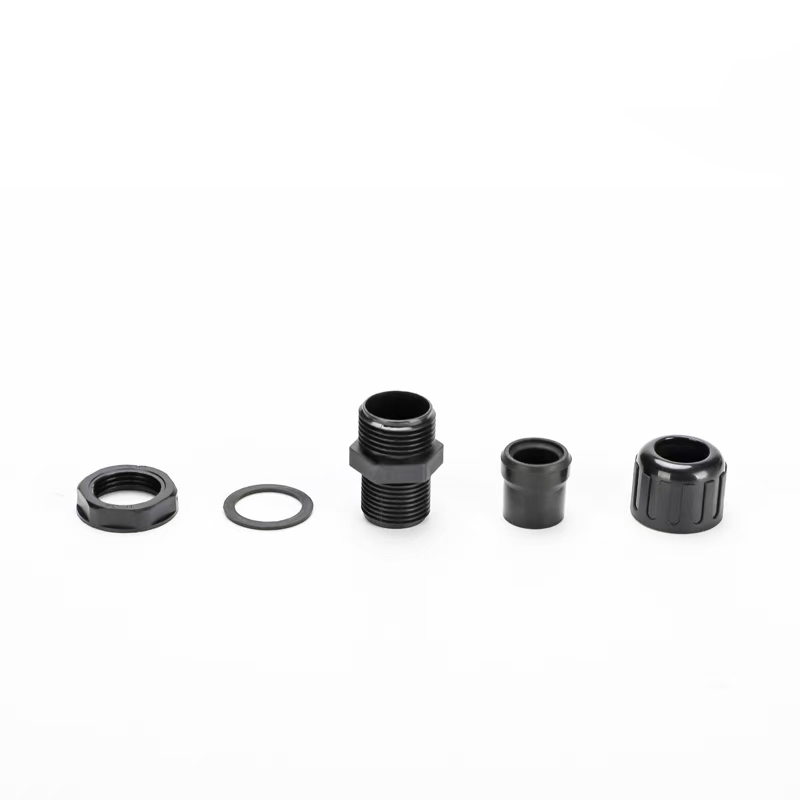
Key Sealing Components
The effectiveness of liquid-tight cable glands depends on three critical sealing points:
Primary Seal (Cable-to-Gland Interface)
- Compression ring system: Creates radial compression around the cable jacket
- Material compatibility: NBR or EPDM seals for different cable types
- Size matching: Critical 85-95% cable diameter to gland bore ratio
Secondary Seal (Gland-to-Enclosure Interface)
- Thread engagement: Minimum 5 full threads for proper seal
- O-ring groove design: Prevents seal extrusion under pressure
- Surface finish: Ra 0.8μm maximum for optimal seal contact
Tertiary Protection (Environmental Barriers)
| Protection Level | IP Rating | Test Conditions | Applications |
|---|---|---|---|
| Dust-tight | IP6X | Talcum powder test | All outdoor uses |
| Water-resistant | IPX7 | 1m submersion, 30min | Ground-level installations |
| Waterproof | IPX8 | Continuous submersion | Underground/marine |
At Bepto, we’ve tested our liquid-tight glands to withstand 10 bar pressure for 24 hours – that’s equivalent to 100 meters underwater! 😉
Which Material Should You Choose for Your Outdoor Application?
Material selection can make or break your outdoor installation’s longevity and safety performance.
Nylon offers excellent cost-performance for general outdoor use, while stainless steel provides superior corrosion resistance for marine environments, and brass delivers optimal EMC shielding for sensitive electronics.
Material Comparison Matrix
Nylon Cable Glands (PA66)
Best for: General outdoor enclosures, solar installations, HVAC systems
Advantages:
- UV-stabilized3 formulations resist degradation
- Operating temperature: -40°C to +100°C
- Excellent chemical resistance to most acids/bases
- Cost-effective for large installations
Limitations:
- Not suitable for high-EMI environments
- Limited mechanical strength vs. metals
Stainless Steel (316L)
Best for: Marine environments, chemical processing, food industry
Hassan, one of our refinery clients, insisted on 316L stainless steel glands for his offshore platform project. After three years of salt spray exposure, they still maintain perfect sealing – no corrosion, no maintenance required.
Performance specifications:
- Corrosion resistance: 1000+ hours salt spray test
- Temperature range: -60°C to +200°C
- Mechanical strength: 2x higher than brass equivalents
Brass (Nickel-plated)
Best for: EMC-sensitive applications, telecommunications, control panels
Key benefits:
- Superior EMC shielding effectiveness (>80dB)
- Excellent machinability for custom threads
- Good thermal conductivity for heat dissipation
Environmental Compatibility Guide
| Environment | Recommended Material | IP Rating | Special Considerations |
|---|---|---|---|
| Coastal/Marine | 316L Stainless Steel | IP68 | Salt spray resistance |
| Industrial/Chemical | Nylon PA66 | IP67/68 | Chemical compatibility check |
| EMC-Critical | Nickel-plated Brass | IP67 | Grounding continuity |
| High-Temperature | Stainless Steel | IP67 | Seal material upgrade |
How Do You Ensure Proper Installation for Maximum Protection?
Even the best liquid-tight gland will fail if installed incorrectly – I’ve seen too many warranty claims from installation errors.
Proper installation requires correct torque values, thread sealant application, and cable preparation to achieve the manufacturer’s IP rating specifications.
Step-by-Step Installation Protocol
Pre-Installation Checks
- Cable diameter verification: Measure actual cable OD, not nominal size
- Thread compatibility: NPT, Metric, or PG thread matching
- Enclosure wall thickness: Verify adequate thread engagement
Installation Sequence
Step 1: Cable Preparation
- Strip outer jacket to expose conductors (if required)
- Clean cable surface of oils/debris
- Check for nicks or damage that could compromise seal
Step 2: Component Assembly - Apply thread sealant to male threads only
- Hand-tighten gland body into enclosure
- Insert cable through compression components
Step 3: Final Tightening
Critical torque values (from our ISO9001 procedures): - M12 glands: 8-10 Nm
- M16 glands: 12-15 Nm
- M20 glands: 15-20 Nm
- M25 glands: 20-25 Nm
Step 4: Seal Verification - Visual inspection of O-ring positioning
- Cable pull test (50N minimum retention)
- IP testing if critical application
Professional Installation Tips
From my experience training installation teams across Europe and the Middle East:
Thread Sealant Selection:
- Anaerobic compounds4 for metal-to-metal threads
- PTFE tape for plastic applications (2-3 wraps maximum)
- Never use both together – they’re incompatible!
Common Torque Mistakes:
- Over-tightening crushes seals and cracks housings
- Under-tightening allows water ingress through threads
- Use calibrated torque wrench, not impact drivers
What Are the Common Mistakes That Compromise Waterproof Performance?
Learning from failure analysis helps prevent costly equipment damage and safety incidents.
The most critical mistakes include incorrect cable-to-gland sizing, inadequate thread engagement, using incompatible seal materials, and neglecting thermal expansion considerations in outdoor installations.
Top 5 Installation Failures (Based on Our Field Analysis)
Mistake #1: Wrong Size Selection
Problem: Using oversized glands for smaller cables
Consequence: Compression seals cannot grip properly
Solution: Maintain 85-95% cable diameter to gland bore ratio
David’s solar project initially failed because they used M20 glands for 12mm cables – the compression ring couldn’t create adequate seal pressure.
Mistake #2: Thread Engagement Issues
Problem: Less than 5 full threads engaged
Consequence: Seal failure under thermal cycling
Solution: Calculate enclosure wall thickness + gland length before ordering
Mistake #3: Seal Material Incompatibility
| Cable Type | Compatible Seal | Incompatible Seal | Result |
|---|---|---|---|
| PVC jacketed | NBR (Nitrile) | Silicone | Swelling/degradation |
| PUR jacketed | EPDM | NBR | Chemical attack |
| Halogen-free | EPDM | Standard NBR | Premature aging |
Mistake #4: Ignoring Thermal Expansion
Outdoor temperature swings create significant stress on sealed connections:
- Daily cycles: -20°C to +60°C possible
- Expansion rates: Different materials expand at different rates due to thermal expansion5
- Solution: Use flexible strain relief and oversized entry holes
Mistake #5: Inadequate Cable Support
Problem: Cable weight/movement transmitted to gland seal
Consequence: Fatigue failure of compression components
Solution: Install cable clamps within 300mm of gland entry
Quality Verification Checklist
Before energizing your outdoor enclosure:
- Visual inspection of all seal surfaces
- Torque verification with calibrated tools
- Cable retention test (50N minimum)
- Continuity check for EMC applications
- IP rating verification (if critical)
At Bepto, we provide detailed installation guides and video tutorials for every product series. Our technical support team has helped resolve over 1,000 installation challenges across 40+ countries.
Conclusion
Selecting and installing liquid-tight cable glands correctly ensures reliable outdoor enclosure protection and prevents costly equipment failures.
FAQs About Liquid-Tight Cable Glands
Q: What IP rating do I need for outdoor enclosures?
A: IP67 minimum for outdoor use, IP68 for areas prone to flooding or washing. IP67 protects against rain and temporary immersion, while IP68 handles continuous submersion up to specified depths.
Q: Can I use the same gland for different cable types?
A: No, seal material compatibility varies by cable jacket. PVC cables need NBR seals, while PUR cables require EPDM seals to prevent chemical degradation and maintain long-term sealing performance.
Q: How often should liquid-tight glands be inspected?
A: Annual inspection minimum for critical applications, semi-annual for harsh environments. Check for seal degradation, cable movement, and enclosure integrity. Replace immediately if any compromise is detected.
Q: What’s the difference between liquid-tight and watertight glands?
A: Liquid-tight glands meet stricter sealing standards with multiple seal barriers and pressure testing. Watertight typically refers to basic splash protection, while liquid-tight ensures submersion protection per IP68 standards.
Q: Can liquid-tight glands be reused after cable replacement?
A: Generally no – compression seals deform during installation and lose sealing effectiveness when disturbed. Always use new sealing components when replacing cables to maintain IP rating integrity.
-
Review the official International Electrotechnical Commission (IEC) standard that defines the IP code for Ingress Protection ratings. ↩
-
Understand the technical definition of a hermetic seal and the standards used to test for airtight connections. ↩
-
Learn how UV stabilizers are added to polymers to protect them from long-term degradation caused by sunlight. ↩
-
Discover how anaerobic adhesives and sealants work, curing in the absence of air to lock and seal metal threads. ↩
-
Explore the concept of thermal expansion and see how different materials expand and contract with temperature changes. ↩